
How to tackle a major revision
Now that you’re finally over the disappointment of receiving a major revision (and not a rejection!) on your cherished paper, it’s time to start working. My strategy is based on Tanya Golash-Boza’s post and is modified slightly to suit my workflow. The use of a spreadsheet may sound crazy to some (it did to me!) but it really helps to see things visually and chances of missing something are greatly minimised.
Step 1: Keep Calm and Read the Comments
As I mentioned in the last post, read the all the comments made by the reviewers and the associate editor without any bias or emotion to get a sense of what they require of you. If your supervisor has read the comments too then get a feel of what he or she thinks. It is quite likely that they may spot something that you’ve missed (based on their experience).
Step 2: List the revisions in a spreadsheet
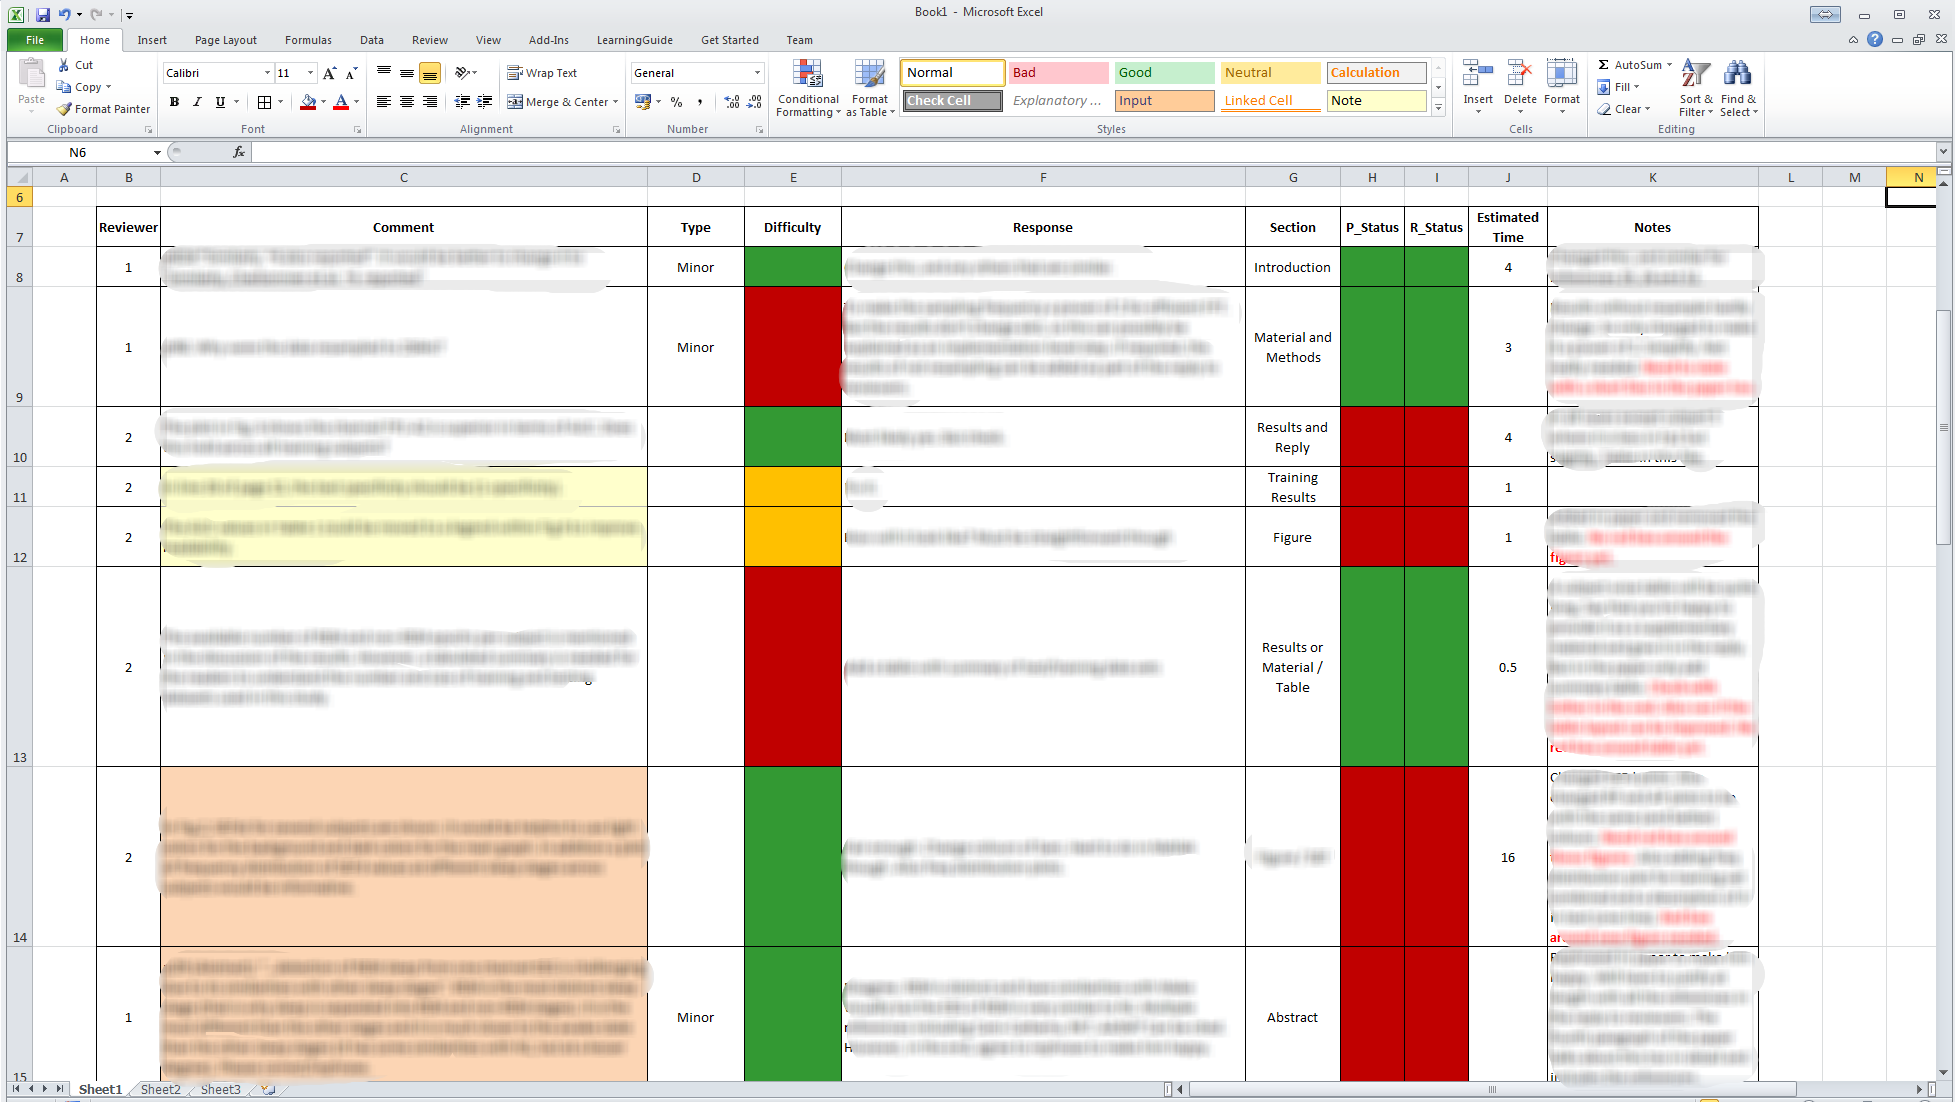
Following Tanya’s suggestion, make a spreadsheet to list all the revisions, one comment per row. Also wrap the text in the cell otherwise its hard to follow long comments. I use the following columns in my spreadsheet (few more than her) that are explained below:
- Reviewer: ID of reviewer i.e. 1,2,3, etc. or AE (for associate editor).
- Comment: Reviewer’s comment. I paste it exactly as it is so that I get to read it multiple times (regardless of how heartbreaking and mean it may be). This also helps me to ensure I haven’t missed anything and understand the comment more clearly.
- Type: Whether the comment is major or minor. Helpful when reviewers say it themselves.
- Difficulty: I colour code this as green, orange or red depending on the relative effort required to answer the comment. Sometimes a major revision requires less effort than a minor comment!
- Response: My initial response to a particular comment.
- Section: Which section in the paper will this be addressed in?
- P_Status: Status of changes made in the paper. Traffic light colour coding with red for not started, orange for in progress and green for finished.
- R_Status: Status of reply in the response letter to reviewers. Colour coded as above.
- Estimated Time: Roughly approximate number of hours/days needed to address a reviewer’s comment.
- Notes: Any extra notes related to this particular comment.
Step 3: Find links between comments
Some issues may have been flagged by multiple reviewers that are exactly the same. There may be multiple comments by the same reviewer as well that are saying the same thing essentially. I colour the cells of these comments on my spreadsheet using very light colours (different for each comment, but one colour for the group).
Step 4: Rearrange the rows
I’d usually put the easier bits on top. These are the rows with green/orange cells in the Difficulty column. But you’re free to choose any order you’re comfortable with. When rearranging make sure all the columns are correctly moved up or down. Also put the linked comments next to each other (same coloured rows). My final spreadsheet looks something like this:
Step 5: Estimate total time
This is essentially summing up the time column to see what your next couple of months are going to look like. If you’re sure you need more time then there’s no harm in asking for an extension. I find this step really important because it gives me an instant idea of whether I can delay my work on the revisions or not.
Step 6: Frame the response for each comment
In the response column, write detailed notes on how you’re going to answer each comment made by the reviewer. I use this column first to put my initial thoughts about every comment.
Step 7: Go green!
The red cells in the status column need to go green! The way I work is that I first make the change in the paper and change its status in the spreadsheet. I also write a proper reply to a particular reviewer’s comment at the same time in a different file.
Step 8: Review
This is the most boring part. Once all the red status cells are green, make sure that the changes you’ve made actually make sense. Get someone to read, if possible. Check the grammar too. Ensure you have made all the changes in the paper and have a corresponding response for each change. If you disagree with something, you must justify it very clearly.
Step 9: Submit
And wait, for the good news!